
Been doing a new hobby lately, lurking at sweet potato days chat box and forgetting all the food photography and baking activities for quite long time ^^. However, as always, feeling grateful of being a KBB member with the regular challenge given, therefore I've always come back here, and update you with another baking journey of mine.
For the 32nd challenge, we are doing a Japanese Roll Cake baking. This type of roll cake was introduced by Junko a Japanese Baker. I have seen my fellow Indonesian baker made this type of cake and upload it on Facebook. I'm not a fan of a roll cake, but looking at those cute pattern that we could make I decide to give it a try (I have to do it anyway as it is a challenge ^^).
So, for this challenge we have to make two roll cakes. The first one with heart pattern, and the second one is up to us. For the free style pattern, I ask my daughter to help me with it. She decided to make an under the sea pattern, with fish; seaweeds; clam and so on. We were having a good time while making it.
Here is the recipe :
Japanese Roll Cake
source : Junko Book, modified by Rachmah Setyawati
Ingredients
A
 4 egg yolks
40 gr castor sugar
40 cc sunflower seed oil
60 cc water
80 gr flour
B
60 gr egg white
15 gr castor sugar
10 gr corn flour
C
160-175 gr egg white
pinch of fine salt
50 gr castor sugar
1 tsp lemon juice
15 gr corn flour
Filling
Whipped fresh cream
How To
 1. Prepare mixture A, beat egg yolks and castor sugar until pale white, thick and fluffy. Leave mixer on medium speed, while adding oil a little at a time. Once the oil are completely mixed, add water and then fold flour into the cake batter.
2. Prepare mixture B which will be used to draw the pattern. Beat egg whites and half of sugar to soft peak batter, add remaining sugar, leave mixer speed at medium. Fold in corn flour.
3. Mix 5-6 tablespoon of mixture A to mixture B. Divide into several container, according to your pattern colors. Add coloring, and mix thoroughly.
4. Prepare two 20 cm square pan. Put your pattern paper on it, and lay a sheet of baking paper on top of it. Glue with margarine to make it steady. Start drawing pattern with your batter which already put in a decorating plastic bag. Once it finished, put them inside the freezer for approximately 20 minutes.
5. While waiting for the pattern to fix, heat the oven to 165-175 C.
6. Prepare mixture C, beat white eggs and half of sugar to soft peak, add remaining of sugar, lemon juice. Finally fold in corn flour.
7. Get half of mixture C, and mix it with mixture A. Fold it gently. Once it's completely mixed, add remaining mixture C and mix it again.
8. Pour cake batter on top of the frozen pattern on both pans. Bake in the preheated oven for 20 minutes (approximately, depends on your oven).
9. Once it is done, remove cake from the pan, peel baking paper carefully. Cool the cake.
10. After the cakes are completely cool, spread whipped cream on top of it, roll, and put them in the refrigerator over night. Cut it when completely set to get a clean result.
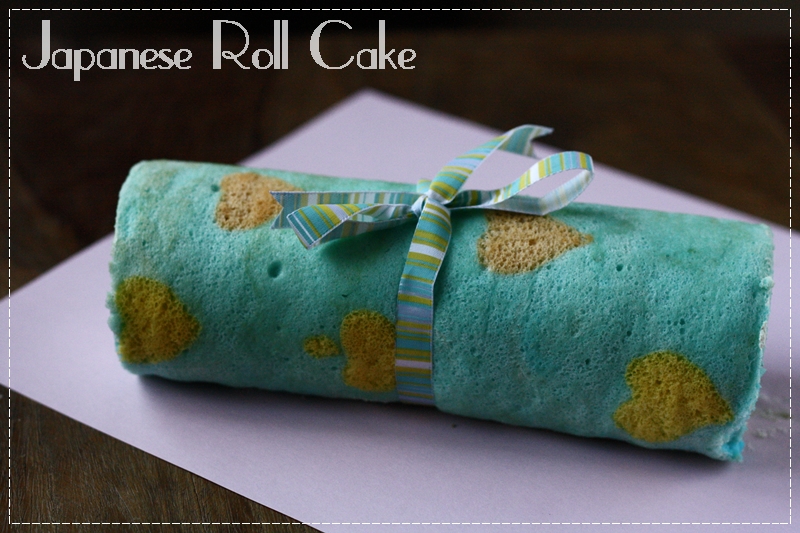
Actually I made this cake twice. I was not really satisfied with the first result, since all the pattern I drew, stick on the baking paper. On the second attempt, I smear margarine thinly on the baking paper. The pattern came out nice, but there are some brown spots visible. Though it doesn't seem so clean, I would rather choose the second method as I can see my pattern clearly.

The cake tastes nice, fresh, and it would be better if you put chopped peach on top of the cream. It is not too sweet, absolutely my type of cake, and I plan to challenge my self with another cute pattern. This is no doubt is one of my family favorite dessert.