Sunday, January 30, 2011

KBB#21 Creme Brulee

It was like a dream when reading the challenge email sent by KBB#21 host Mira and Molly that chose crème Brulee as the daring task. I was curious about crème Brulee ever since I watch Whitney Miller making this dessert on one episode of Master Chef. I was wondering how's the taste, the textures and even how would those top caramel impress your tongue? Thus, really huge thanks to the host of #21 challenge... again without KBB maybe I would only keep wonder and wonder and wonder... it surely going to be an everlasting wonder... :P

After reading the recipe, I chose to remove Rhubarb and change it with Pineapple. Yep, as I live in tropical country I thought that it might be nice to have a tropical crème brulee, instead I will learn to peel this fruit on my own which I have never done before.

Here is the recipe, with some modification made by me... :) and I was only making half the recipe.


Creme Brulee
Source: Jamie Oliver: The Naked Chef 2

Serves 6

Ingredients
300g fresh rhubarb – substitute with pineapple
3 Tbs caster sugar
2 vanilla pods
300ml double cream – 500 ml of whipcream
200ml full fat milk – no milk added... all cream (imagine the fat!!!!)
8 egg yolks
80g sugar


How to 
Preheat the oven to 140C.
Roughly slice up the pineapple and place it in a pan with the caster sugar and 5 tablespoons of water. Simmer until tender, divide between serving dishes which your brulee will be cooked in, then set aside.

Score the vanilla pods lengthwise and run the knife up the pod to remove the vanilla seeds.


Scrape these into the pan with the pods, cream and milk and slowly bring to the boil. 
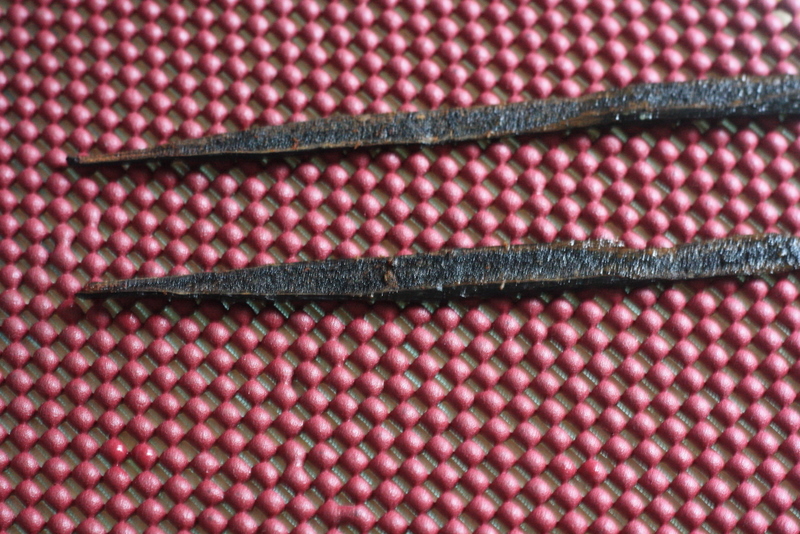
Meanwhile beat together the yolks and the sugar in a bowl until light and fluffy.
When the cream and milk are just boiling, remove the vanilla pods and add little by little to the egg mixture, whisking continuously. (I was using a mesh to separate pods from mixture at this stage) 
I like to remove any bubbles or froth from the mixture before dividing it into the serving dishes. (you can remove it with the aid of kitchen blow torch or scoop big bubble with spoon manually)
 
Stand these in an appropriately sized roasting tray filled with water up the containers, and bake in the pre-heated oven for around 25 minutes until the custard mixture has set but is still slightly wobbly in the centre.

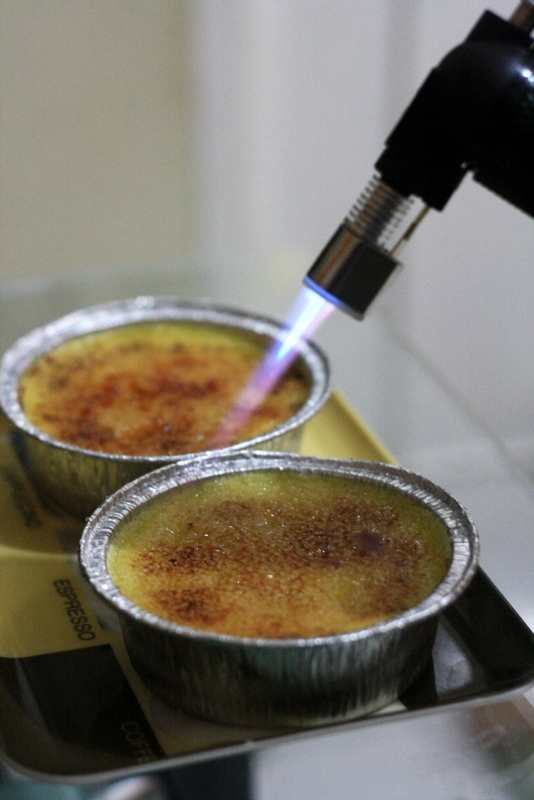
Allow to cool to room temperature then place in the fridge until ready to serve. Sprinkle with sugar and caramelize under a very hot grill or using a kitchen blowtorch. 
Done

And how does it taste? Incredibly yummy... tolerably sweet, and make your day feels even better.

How is the texture? Soft, creamy, simply irresistible, even my husband finish one and a half cup and left only a half cup for me... sigh.

How does the top burnt sugar touch your tongue? Amaaazing... I think I blew it perfectly as it still taste sweet with only a little bitterness, and looks beautiful.... what do you think?

The taste is just as good as I imagine when I saw Whitney made this and spell this dessert's name out of her mouth... wait... it's even better than I expected.

I dare you to try... and be generous... send me some... :)


Wednesday, January 19, 2011

Naruto Birthday Cake


Naruto Theme Birthday Cakes for Arvin... 


Four layers chocolate sponge cake, filled and covered with butter cream.  

Tuesday, January 18, 2011

Bajigur or Bandrek....


Those two mentioned in the title are Sundanese traditional hot drinks. I rarely found those two unique drinks, here in Cikarang now. 

During my childhood in Bandung, every afternoon you will get this kind of drink easily in a food stalls, food market or even somewhere close to my house. 

Getting used to "so so taste" of instant Bajigur or Bandrek, making me feel really glad to "finally" taste the real home made Bajigur and Bandrek at Sari Papandayan Restaurant in Garut. 


Though I can't bring you some, as usual, I took some pictures of it... and imagine that I drank this thick Bajigoer while looking at Papandayan Mountain in front of me... Amaaziiing... :)

And if you never taste Bajigur and Bandrek, and care to know... here is the link to find out more Bajigur and Bandrek. (Lazy meee... I know )

Monday, January 10, 2011

RM Jatinunggal - Hidden Treasury Place

Though I was born to be a Javanese, I spent my childhood time in Bandung which is a Sundanese area. That is why, I am more familiar to Sundanese food such as Karedok, Lotek, compare to Javanese food such as Gudeg and ........... (see I can't even mention more). 

Sometimes, after I live in Cikarang. I miss those delicious fresh and spicy Sundanese food, as in here it won't be easily to find a good Sundanese food. Plenty are available because Cikarang is located in Sunda area, however none can compare the taste of Bandung's Sundanese food. Until I find this place, which is located not quite far from my home in Cikarang, about 30 minutes drive. Hidden place, though so many people comes and enjoy the nice and reasonable price Sundanese Food. Here, I will tell you about Jatinunggal Restaurant at Jonggol. 

This place is located next to Jatinunggal Irigation Line at Jonggol. Just pay attention on  a sign over a bridge on Jonggol-Rawey road. I tried to pin it on Google Map, however I am not sure about the coordinate.  You can send me a message when you plan to go there, and I will happily give you a clue. :)

I went there with my family, consists of Mom, Dad, Hubby, K-Chan, Two Brothers, and Sis in Law. We spent around 300.000 rupiah for all, and here are some of what we ate


Hmm Yummy Right ?

The taste is just right, absolutely Sundanese. Fresh Fishes, grilled perfectly, nice sambal, though my juice was a little bit too sweet for me. But all in all, we were all satisfied. And will do a second visit, of course. 

So why don't you give it a try !

Thursday, December 23, 2010

Tira Miss You

Hi, long time no see...
Yep, it's been a while since my last "english post". Someone was complaining about my KBB post which was written in bahasa... yeah it was an important post for me, so that I prefer to write it in bahasa.

Now, I am writing again, yes and it's in english. Wohoo enough for un-important prolog, we'll go to the main topics okay.


So, I will tell you about one easy dessert to make, originated from Italy. People call this tremendously delicious dessert with TIRAMISU... I wrote it Tira miss you as it's been a long time that I didn't write in this blog and it is also been a while since my last Tiramisu making, thus... I miss You

I've got an order, and it became two, from two friends that I met at K-Chan's school. Frankly, they both have  husbands with the same birth date. So both were ordering this Tiramisu for their husband's birthday. Again, I am using NCC recipe, which has passed the most difficult tester which are my campus mates... the yummy mommies. This dessert has become their favourite, and I am so proud as one of them was the first person who introduced Tiramisu to me, and now she is the one who often ask me to make and bring Tiramisu for all of us when we have the chance to meet.

Here is the recipe, it is reaaally easy :

Tiramisu
Recipe : By Fatmah Bahalwan NCC

Ingredients
250 gr of mascarpone cheese
300 ml whipped cream
100 gr powdered sugar
1/2 tsp vanilla essence
4 egg yolks
50 gr castor sugar

Additional Ingredients
2 tbs instant coffee plus 1 tbs of sugar, dilute with 150 ml of warm water
20 pcs lady fingers

Garnish:
Whipped cream and chocolate powder as much as you like

How To
Soften mascarpone cheese using balloon whisk, only to form a soft mixture
Whip cream and powdered sugar to form a thick cream, set aside in the refrigerator
Mix egg yolks, castor sugar and vanilla essence to thick, continue mixing on boiled water to warm the eggs, bring to room temperature while continuing mixing.
Mix whipped cream, mascarpone cheese using balloon whisk, spatula or mixer set on the lowest speed.
Add egg yolks mixtures, mix thoroughly and set aside

Finishing
Dip lady fingers in the coffee and put all over the bottom of a springform pan.
Add mascarpone mixture, flat the surface and put another layer of dipped lady fingers on top of it.
Repeat this step until you get the height of cakes that you want or until all the mixture are finish. :)
Garnish with whipped cream and chocolate powder.
Freeze in refrigerator for 4 hours before served

There you go, you are ready to enjoy the Tiramisu. Trust me you will never find a better Tiramisu than this one. It is still good though it is alcohol free.

Happy Friday

Thursday, November 18, 2010

KBB#20 Biskuit Tradisional : Kue Bangket Susu


Pucuk dicinta ulam tiba, akhirnya... KBB buka lagi pendaftaran untuk anggota baru dan dengan membulatkan tekad... aku mendaftar, hihihi, wish me luck ya, semoga bisa memperkuat komitmen aku dalam dunia perbakingan, amiin... halah serius banget... :)


Daan, akhir oktober, datanglah si surat cinta dari host tantangan KBB#20. Oh iya, statusku sekarang masih calon anggota, untuk diterima sebagai anggota, harus memenuhi dua tantangan dulu. You see bahwa ini bukan klub baking biasa... :)

Owkeh, tantangan bulan ini adalah bikin "Kue Bangket". Tilik punya tilik, sebenernya sejak lebaran udah salin2 resepnya dari blognya mbak riana ambarsari, cuma ngga dikerja-kerjain. Nah ini nih fungsinya ikut KBB jadi tiap dua bulan at least aku harus tetep baking, semangat ga semangat, bete ngga bete, biar tetep konsisten bow.

Dari dua resep yang dikirim, akhirnya aku prefer bangket susu aja. Karena liat komposisi bahannya seems lebih cocok dengan selera lidahku dan lidah little k. Jadi ini dia resepnya :


Bahan:
• 500 gr sagu
• 100 gr margarine
• 150 gr gula halus
• 75 gr susu kental manis


Cara

  1. Sangrai tepung sagu dengan daun pandan yang dirobek-robek (api kecil) sampai daun pandan mengering. 
  2. Kocok mentega sampai lembut, kemudian campurkan sisa bahan. 
  3. Cetak dengan cetakan kue satu
  4. Panggang dalam oven bersuhu 140 C selama 10 menit
  5. Pindahkan ke dalam toples setelah kue benar-benar dingin
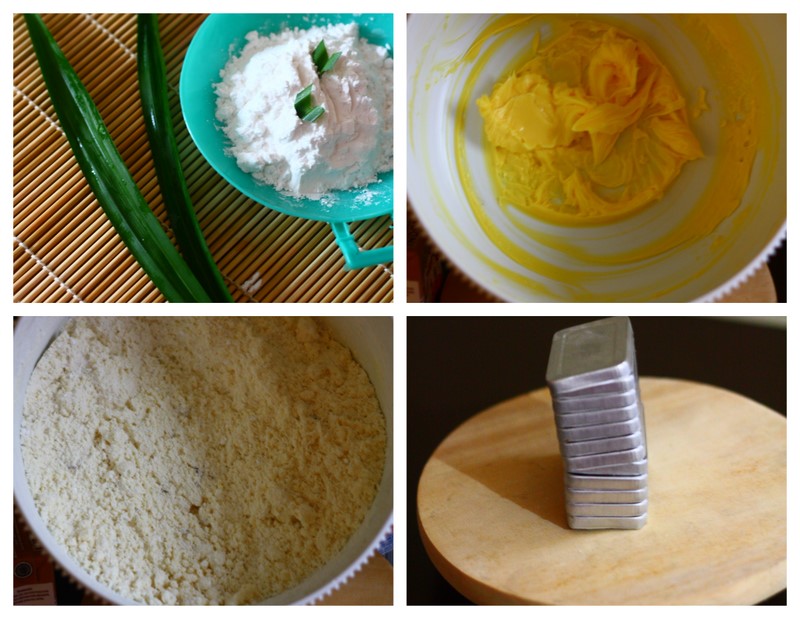
Searah Jarum Jam : Tepung Sagu dan Pandan, Mentega kocok, Bahan  siap cetak, Cetakan kue satu #1
Oh iya, waktu awal dapet resep ini sempet bingung sama seperti apa bentuk cetakan kue satu. Nyari-nyari di beberapa toko, akhirnya pilihan jatuh sama bentuk cetakan yang gepeng-gepeng seperti gambar di atas, karena biasanya kalo dioleh2in kue satu dari Banyumas bentuknya gepeng2. Ternyata waktu dipake nyetak, karena terlalu tipis, ngga ada kue yang utuh... hiks ancur semua. Untungnya, beli juga cetakan versi lain, yang kaya di bawah ini :


Dan akhirnya bisa dicetak, dipanggang, difoto terus dimakan... dan mmm yummy, just like what I expected. Hampir serupa dengan kue sagu keju my fav cookie (dan bikin kepikiran pingin nambahin keju sekalian di adonannya next time). Rasanya tetep tradisional, tapi ga kalah nagih dengan kue-kue internasional. 


Okay, I'm done with my first bangket cookie... and will wait for the next challenge of KBB. Wish me luck... :)


Wednesday, October 13, 2010

Black Forest for Naomi


Yaay, out of nowhere, three days ago I've got an order for making a birthday cake for Naomi, a 4 years old girl living next door. She will celebrating her birthday in her school this afternoon. Request from the birthday girl, the cake must be a chocolate cake, heart shaped, and topped with looots of chocolate. So, I made a blackforest cake, filled and covered with whip cream and decorated with grated chocolate. Hope she'll like it.

By the way, last night when I was about to decorate the cake, suddenly, the electricity went off. Hiks, I was panic since I covered the cake already with whipcream, and afraid that it will melt and ruin everything. But, with all the optimistic I have in the middle of a dark night, I continue to decorate while wishing the electricity will be recover soon. Decorating cake with only aided by a candle light in the middle of silent night was sooo romantic :P, I put piece by piece of cake while wondering would the birthday girl love the cake, I hope she will, crossing my finger now. Everything were still dark even after I finished decorating. I put the cake back in refrigerator, hoping that the cake will still look as nice as when I finished at the time I wake up the next morning. And, voila, as you see in the picture above it is still looks OK and ready to deliver.

Moral of story, when there is a will there will be a way... never give up no matter what happened. :)

Will deliver the cake to the birthday girl soon... wish me luck!!!